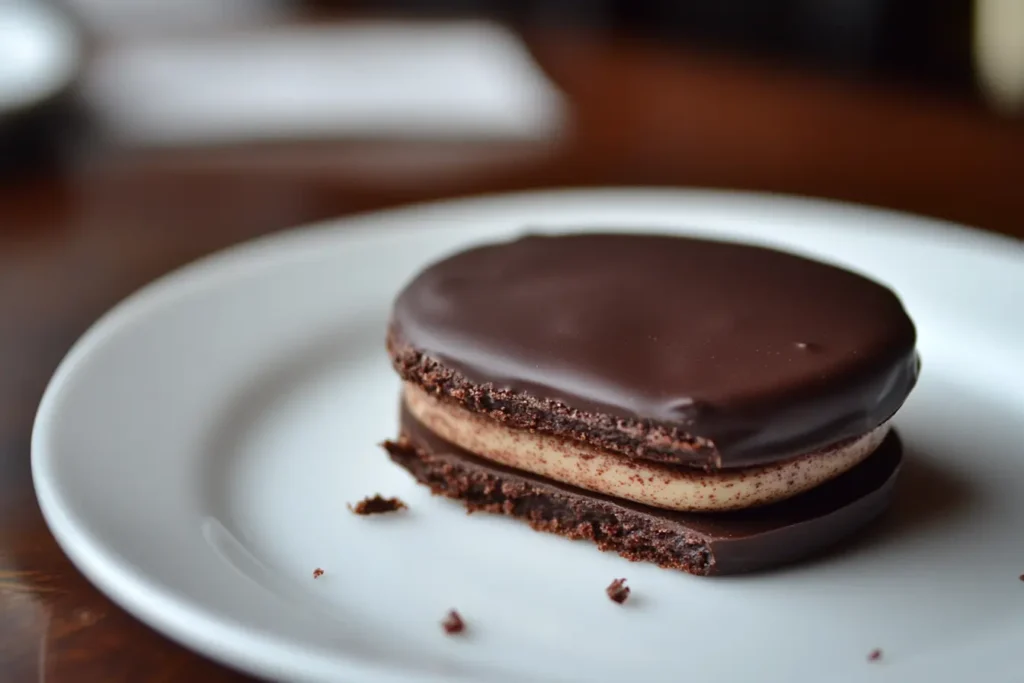
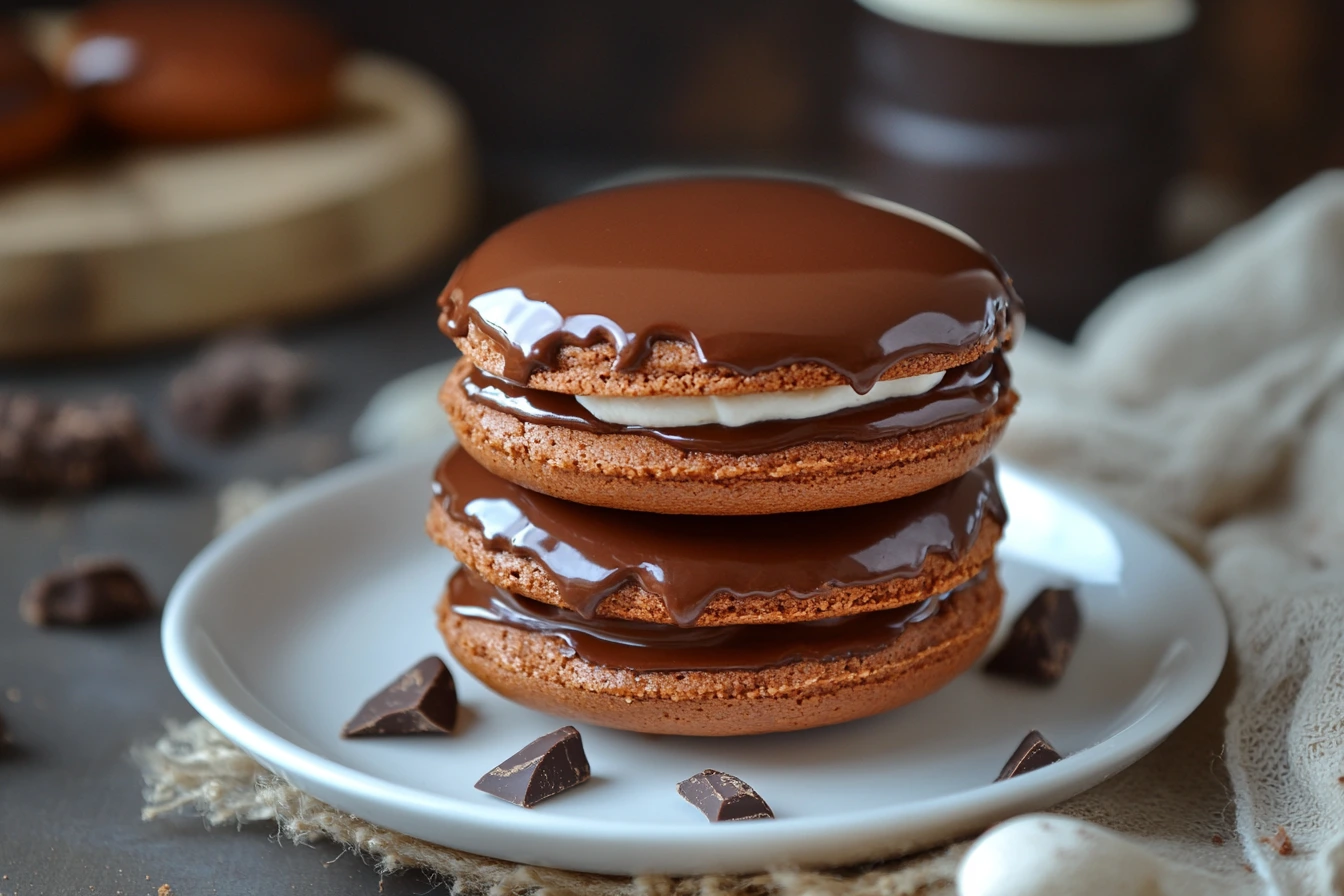
First and foremost, the Choco Pie Recipe is a beloved sweet treat cherished by people worldwide. It offers a perfect mix of soft marshmallows, rich chocolate, and tender cake. As a result, these simple snacks bring joy to afternoon tea breaks and lunch boxes alike. Furthermore, their special blend of textures and flavors continues to keep fans coming back for more.
Table of Contents
What is a Choco Pie?
Initially, a Choco Pie Recipe brings together three key parts to create snack magic. At its foundation, two round cake layers form the base. In the middle, a soft marshmallow filling creates the heart of the treat. Finally, a coating of smooth chocolate covers it all. Consequently, it resembles a fancy moon pie yet maintains its own special touch. Above all, each bite begins with a light crack of chocolate. Subsequently, you’ll discover the fluffy marshmallow center. In conclusion, the soft cake rounds out the experience perfectly. It’s similar to the famous Brookie Recipe: Brownie Cookie Delight in how it blends multiple elements into a single treat.
Ingredients Needed for Choco Pie Recipe
Starting with quality ingredients ensures a successful baking experience. Moreover, having everything measured and ready will help you create perfect Choco Pies every time. Therefore, let’s explore all the components needed for this beloved treat.
Basic Ingredients
To create the cake layers, gather these essential items: First, measure the all-purpose flour, creating a tender foundation. Next, you’ll need granulated sugar to provide balanced sweetness. Meanwhile, unsalted butter contributes to that melt-in-your-mouth texture. Additionally, fresh eggs add the necessary richness and structure. Finally, vanilla extract and baking powder complete the cake base with flavor and lift.
The marshmallow filling requires careful attention to ingredients: Begin with white sugar as your sweetness base. Light corn syrup prevents unwanted crystallization in the mixture. Fresh egg whites contribute to the signature fluffiness we all love. To enhance the overall taste, pure vanilla extract adds welcomed depth.
For the perfect chocolate coating, gather High-quality semi-sweet chocolate chips that offer balanced flavor notes. Additionally, coconut oil or shortening helps achieve that satisfying snap when bitten.
Optional Add-ins for Enhanced Flavor
Transform your Choco Pies with these thoughtful additions: A subtle pinch of salt intensifies the chocolate’s complexity. Meanwhile, almond extract introduces delightful nutty undertones. For deeper chocolate notes, dark cocoa powder works wonders. Furthermore, espresso powder enhances the overall richness remarkably.
Essential measuring tools include precise kitchen scales for accuracy. Quality measuring cups and spoons ensure consistent results. Meanwhile, a reliable thermometer helps maintain crucial temperature control.
Therefore, sourcing high-quality ingredients remains vital for authentic Choco Pies. Taking time to gather the best components within your budget will elevate your homemade treats significantly. As a result, your creations will rival any store-bought version, while bringing fresh satisfaction to every bite.
Step-by-Step Choco Pie Recipe
Before beginning this delightful baking journey, ensure all ingredients are at room temperature. Preheat your oven to 350°F (175°C) to create the optimal baking environment. Line your baking sheets with parchment paper for easy removal of the finished cakes.
Preparing the Biscuit Layers
First, whisk together 2 cups of flour and 1 teaspoon of baking powder in a medium bowl. Meanwhile, in a separate large bowl, cream 1/2 cup of softened butter with 3/4 cup of sugar until the mixture becomes light and fluffy. Subsequently, add two eggs one at a time, beating well after each addition. Then, incorporate 1 teaspoon of vanilla extract to enhance the flavor profile.
Now comes a crucial step: gradually fold the dry ingredients into the wet mixture. To achieve the perfect texture, alternate between adding small portions of flour and 1/4 cup of milk. Moreover, mix until just combined – overmixing can lead to tough cakes. Once the batter reaches a smooth consistency, pipe or spoon it onto your prepared baking sheets in 2-inch circles.
The baking process requires careful attention. Place the sheets in your preheated oven and bake for 12-15 minutes. You’ll know they’re ready when the edges turn slightly golden, and the centers spring back when gently touched. Afterward, allow the cakes to cool completely on a wire rack.
Making the Marshmallow Filling
While the cakes cool, prepare your marshmallow filling. Begin by combining 2 egg whites with 1/4 cup of water and 1 cup of sugar in a heatproof bowl. Next, place this bowl over a pot of simmering water, ensuring the bottom doesn’t touch the water. Subsequently, whisk continuously until the mixture reaches 160°F (71°C) on a candy thermometer.
Once the desired temperature is reached, transfer the mixture to a stand mixer. Then, beat at high speed for approximately 5-7 minutes until stiff, glossy peaks form. Furthermore, add 1/2 teaspoon of vanilla extract during the final minute of mixing. As a result, you’ll have a fluffy, stable marshmallow filling ready for assembly.
Assembling the Choco Pie
The assembly process requires patience and precision. First, pair your cooled cake rounds by size to ensure even sandwiches. Then spoon a generous dollop of marshmallow filling onto half of the cake rounds. Subsequently, place their matching pairs on top, pressing gently to spread the filling to the edges.
Meanwhile, prepare the chocolate coating by melting 2 cups of chocolate chips with 2 tablespoons of coconut oil in a double boiler. After achieving a smooth consistency, let the mixture cool slightly. Then, carefully dip each assembled sandwich into the melted chocolate, ensuring complete coverage. Finally, place the coated pies on a wire rack set over parchment paper to catch any excess chocolate.
For the perfect finish, allow your Choco Pies to set at room temperature for about 1 hour. Alternatively, speed up the process by placing them in the refrigerator for 15-20 minutes. As a result of your careful attention to detail, you’ll have created perfectly crafted homemade Choco Pies that rival any store-bought version.

Tips for Perfect Choco Pie
Creating the ideal Choco Pie requires attention to several key factors. Temperature control plays a crucial role throughout the process, while proper ingredient preparation sets the foundation for success. Moreover, understanding the science behind each component helps achieve that perfect blend of textures we all love.
Ensuring the Right Texture
The secret to achieving the perfect Choco Pie texture begins with room-temperature ingredients. When butter and eggs are properly tempered, they create a more uniform cake batter. Furthermore, this ensures even baking and prevents unwanted density in your cake layers.
For the cake layers, proper mixing technique makes all the difference. Begin by creaming the sugar and butter until the mixture becomes noticeably lighter in both color and texture. This process, which typically takes about 3-5 minutes, incorporates air bubbles that lead to tender, fluffy cake layers. Subsequently, when adding flour, use gentle folding motions rather than vigorous stirring. As a result, you’ll maintain those precious air bubbles and avoid developing excess gluten.
The marshmallow filling presents its own textural challenges. Pay careful attention to the temperature during cooking to achieve that signature bounce. A candy thermometer becomes your best friend here, as heating the sugar mixture to precisely 160°F ensures food safety while preventing overcooked, stringy results. When whipping the marshmallow, look for firm, glossy peaks that hold their shape – this indicates you’ve achieved the perfect structure.
Storing Your Choco Pie
Proper storage ensures your homemade Choco Pies maintain their delightful texture and flavor. First, allow them to cool completely before storing, as any residual warmth can create unwanted condensation. Subsequently, place them in an airtight container, separating layers with parchment paper to prevent sticking.
Your Choco Pies will stay fresh for up to 3 days at room temperature. However, refrigeration might be necessary to prevent the chocolate coating from becoming too soft if you live in a warm climate. When refrigerating, place them in a sealed container and allow them to sit at room temperature for about 15 minutes before serving. This waiting period helps the chocolate coating regain its ideal snap while keeping the marshmallow filling perfectly chewy.
For longer storage, these treats can be frozen for up to 2 months. To freeze successfully, individually wrap each pie in plastic wrap before placing them in a freezer-safe container. When ready to enjoy, thaw them overnight in the refrigerator, followed by 30 minutes at room temperature. Consequently, your Choco Pies will taste nearly as fresh as the day they were made.
Remember that temperature fluctuations can affect the chocolate coating’s appearance, potentially causing something called “bloom” – those whitish streaks that sometimes appear on chocolate. While this doesn’t impact the taste, maintaining consistent storage temperatures helps preserve both flavor and appearance. Therefore, choose one storage method and stick with it rather than moving treats between different temperature environments.
Variations of Choco Pie Recipe
Let’s explore some creative twists on the classic Choco Pie recipe. Moreover, these variations maintain the beloved texture while introducing exciting new flavors. Therefore, you can experiment with these alternatives to discover your perfect combination.
Nutty Choco Pie
Transform the traditional Choco Pie into a nutty delight by incorporating several flavor-enhancing elements. First, add finely ground almonds or hazelnuts to your cake batter, replacing about 1/4 cup of flour with the same amount of nut flour. Subsequently, enhance the marshmallow filling with a touch of almond extract for deeper nutty notes.
To elevate the texture further, consider adding a thin layer of praline between the cake and the marshmallow. Furthermore, you can roll the edges of the finished pies in crushed, toasted nuts before the chocolate coating sets completely. Consequently, this creates a delightful crunch that complements the soft interior perfectly.
Fruit-Infused Choco Pie
Introducing fruit flavors brings a refreshing twist to these beloved treats. Begin by adding freeze-dried fruit powder to your cake batter – strawberry and raspberry work particularly well. Meanwhile, incorporate natural fruit extract into the marshmallow filling for a harmonious taste throughout.
For an extra burst of flavor, consider spreading a thin layer of fruit preserves on the cake layers before adding the marshmallow. Additionally, you might experiment with flavored chocolate coatings, such as orange-infused dark chocolate. As a result, your fruit-inspired Choco Pies offer a sophisticated blend of sweet and tangy notes.
Conclusion
Creating homemade Choco Pies brings both joy and satisfaction to any baking enthusiast. Throughout this guide, we’ve explored the essential techniques, ingredients, and variations that make these treats special. Furthermore, we’ve shared crucial tips for achieving the perfect texture and ensuring proper storage.
Remember that practice makes perfect when crafting these beloved snacks. While your first batch might not look store-bought perfect, the homemade taste will undoubtedly surpass commercial versions. Moreover, experimenting with different flavors and variations lets you discover your favorite combination.
As you embark on your Choco Pie baking journey, don’t hesitate to try new combinations and techniques. Subsequently, you might develop your own unique twist on this classic treat. Finally, share your creations with friends and family because homemade Choco Pies always taste better when enjoyed together.
Explore 10 Irresistible Cake Flavors You Must Try for more dessert ideas and elevate your baking repertoire!

